☢ Installing UTAU and OpenUTAU ☢
This guide is for installing on Windows, using Windows 10 specifically. UTAU should work on Windows 7 or later with no issues.
Mac users, see this tutorial by MystSaphyr on installing UTAU Synth for MacOS.
OpenUTAU works on Windows, MacOS, and Linux.
☆ Setting System Locale (NOT OPTIONAL) ☆
It is very important that you do this before installing UTAU. If you don't, UTAU won't be able to read or display Japanese characters properly, and you'll run into a lot of problems while trying to use it.
Locale is not the same as your computer's language or region; those settings do not have to be changed. Changing locale should not affect anything major on your computer or cause you any problems.
Yes, you have to do this in order for UTAU to work correctly. No, you can't change it back after installation.
FOR OPENUTAU ONLY: You do not have to set your locale in order to use OpenUTAU, but you may still want to if you have any plans to use the old software.
Lastly, make sure you're on an account with administrative privledges, and be prepaired to restart your computer afterwards.
Instructions
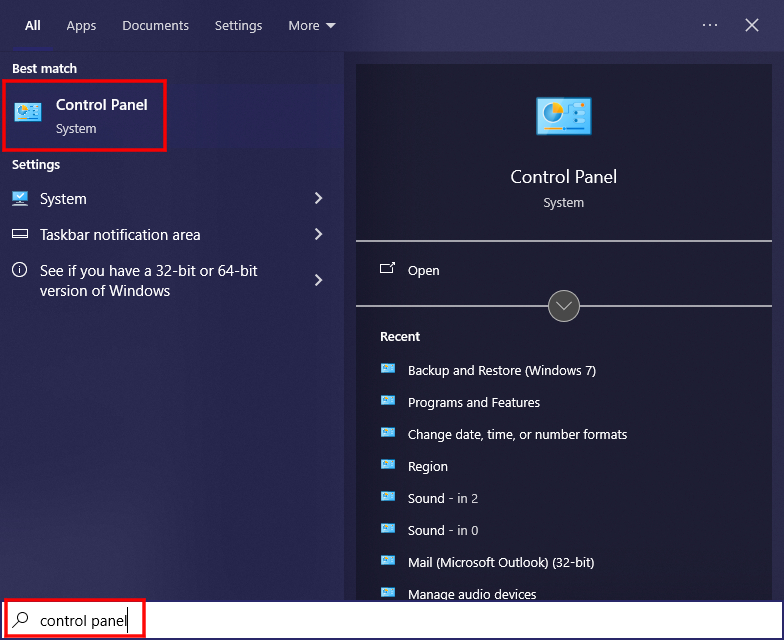
Step 1. Open the Start menu and type in Control Panel (the search bar should appear automatically).
Step 2. When the name and icon appear, open the Control Panel application.
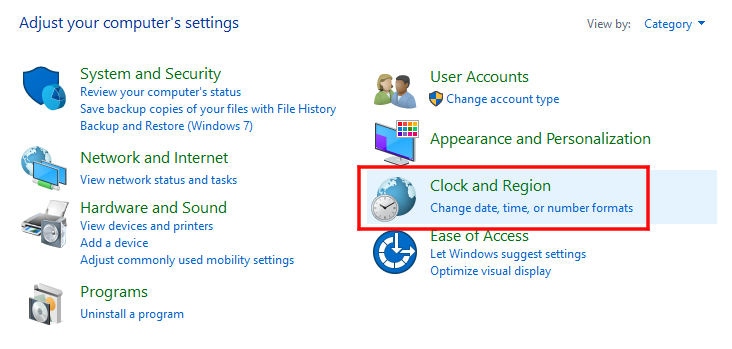
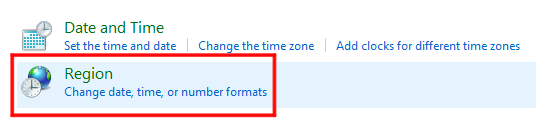
Step 3. Navigate to Clock and Region > Region.
Step 4. In the window that pops up, click on the button that says Additional Settings.
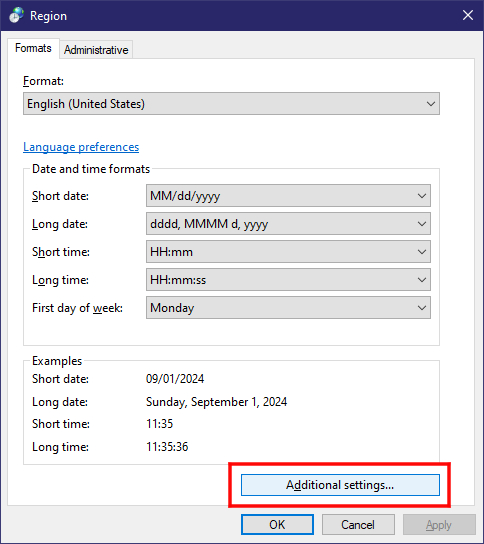
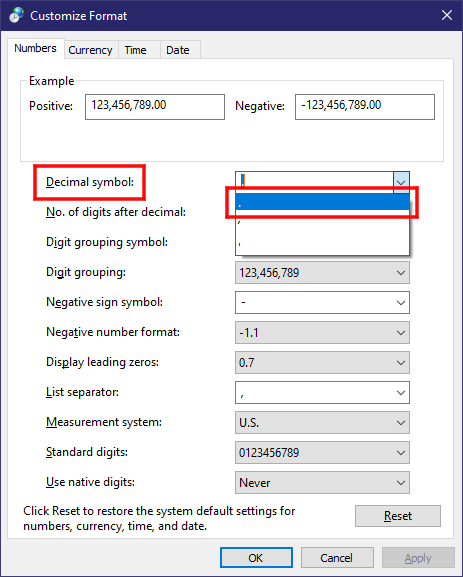
Step 5. In the Customize Format window that pops up, make sure the symbol next to Decimal Settings is a period. If it isn't, select the period [.] from the dropdown menu.
Step 6. Click OK.
Step 7. Back in the Region window, click on the tab labled Administrative.
Step 8. Click on the button labeled Change System Locale.
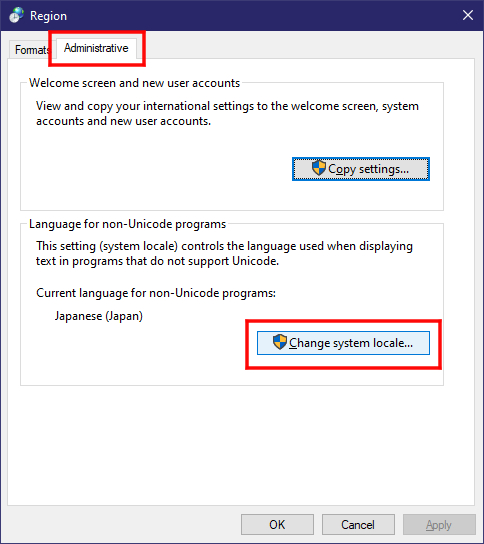
Step 9. In the Region Settings window that pops up, select Japanese (Japan) from the dropdown menu.
Step 10. Click OK, and accept the prompt to restart your computer.

☆ Installing UTAU ☆
Instructions
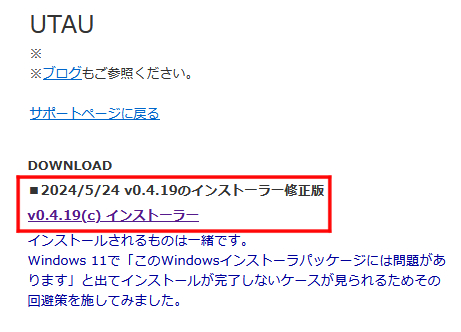
Step 1. Navigate to utau2008.xrea.jp. Select the first link under DOWNLOAD labeled v0.4.19(c) インストーラー (v0.4.19(c) installer). This is the most recent version of UTAU.
Step 2. Download the .zip file wherever you like.
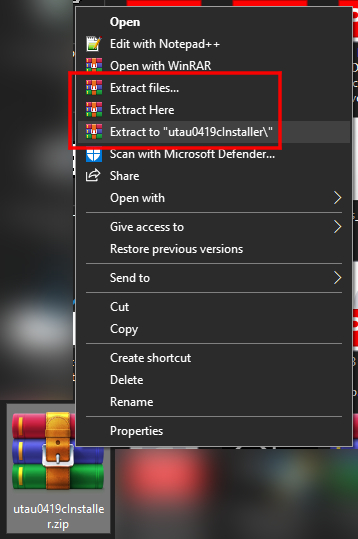
Step 3. Navigate to where the file was downloaded to, and right click on it to extract its contents wherever is convenient. It should only contain a single .exe file.
If you're not familiar with file compression, you'll need an application like winrar or winzip to do this.
Step 4. Once the .exe is extracted, double click on it to run the installation wizard.
Step 5. The installer is in Japanese, and the buttons at the bottom read Cancel, Back (B), and Next (N). Click the Next (N) button once.
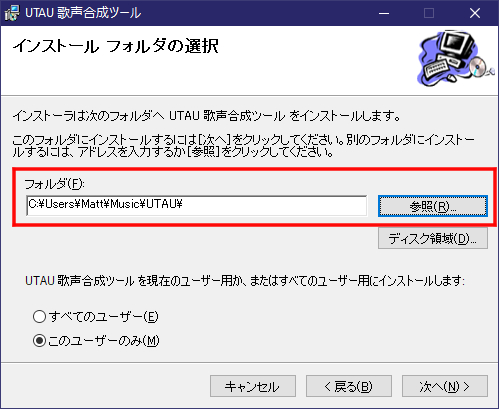
Step 6. The second page of the installer is asking you where you would like to install UTAU. By default, it will be set to your Program Files, but due to newer versions of Windows having restrictions on file permissions in this folder, you may want to instead change this to be somewhere like your Music or Documents folder.
Be sure that the new file path ends in \UTAU\; type it in if it is not already there. This ensures that a folder of this name will be created in the desired location, e.g. C:\Users\[user]\Music\UTAU\
The option at the bottom is asking whether you want to install for all users (E) or only the current user (M).
Once all of these settings are how you want them, click Next (N).
Step 7. Click Next (N) again, and the installation should begin. This should only take a few minutes at most.
Step 8. When the installation finishes, click the button on the bottom right which now reads Close (C) to close the installer.
Checking Your Installation
If you followed all steps correctly, you should now have a folder labeled UTAU wherever you installed it to. Inside of this folder, there should be three subfolders labeled plugins, res, and voice, some .txt and .dll files, and three .exe files: resampler.exe, wavtool.exe, and utau.exe. The latter is the main application.
Inside of voice, you should find a subfolder labeled uta. This is Defoko's voicebank. Inside, there should be a bunch of .wav and .frq files with hiragana names. If the filenames are not hiragana but rather a bunch of garbage characters, it means you did not set your locale correctly, and will need to completely uninstall UTAU and restart the process from the first section.
Setting Interface to English
If your computer's language is set to English, you should not have to do this, but just in case it's in Japanese when you open it up, here's how to change it.
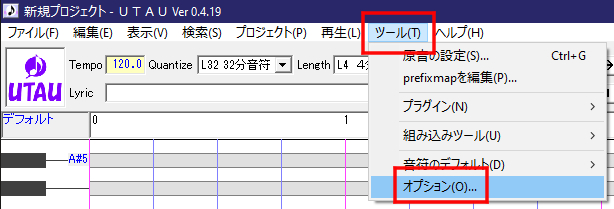
Step 1. Find ツール(T) (tools) on the toolbar.
Step 2. In the submenu, go to オプション(O) (options).
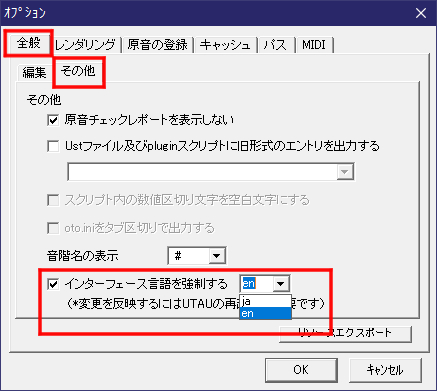
Step 3. In the options menu, click on the second subtab of the first page labled その他 (other).
Step 4. Click the last checkbox on the page labled インターフェース言語を強制する (force interface language).
Step 5. Select en from the dropdown menu, click OK, and restart UTAU.
Now, next time you open it, everything should be in English.
☆ Installing OpenUTAU ☆
Instructions
Step 1. Navigate to openutau.com. Click on the download button that goes with your operating system (when in doubt, try Windows x64).
Step 2. Download the .zip file wherever you like.
Step 3. Navigate to where the file was downloaded to, and right click on it to extract its contents wherever is convenient. It should contain several files; I highly recommend extracting them to their own folder, such as C:\Users\[user]\Documents\OpenUTAU\.
If you're not familiar with file compression, you'll need an application like winrar or winzip to do this.
Step 4. Once the contents are extracted, find OpenUtau.exe and double click to launch it. The software will automatically check for updates when it opens.
User Preferences
By navigating to Tools > Preferences... you can change a variety of software settings. To change the interface language and colour theme, scroll down to the Appearance section.
☆ Japanese IME (Optional) ☆
A Japanese Input Method Editor, or IME is simply a way to allow for typing Japanese characters with a non-native keyboard. This isn't strictly necessary for using UTAU, but it will make your life a hell of a lot easier, so I highly recommend it.
You can follow this brief tutorial for instructions on how to set it up and use it. It should be fairly straightforward.